A channel is a combination of a source and destination with optional routing applied. Hence, when you have configured server and folder settings for your sources and destinations, setting up a channel is as simple as choosing a source and a destination.
Go to the Channels tab in the Connect configuration screen and then click on the green Plus icon in the channel pane.
You can then choose input and output folders for the channel and optionally specify a routing to apply to the channel.
General channel settings
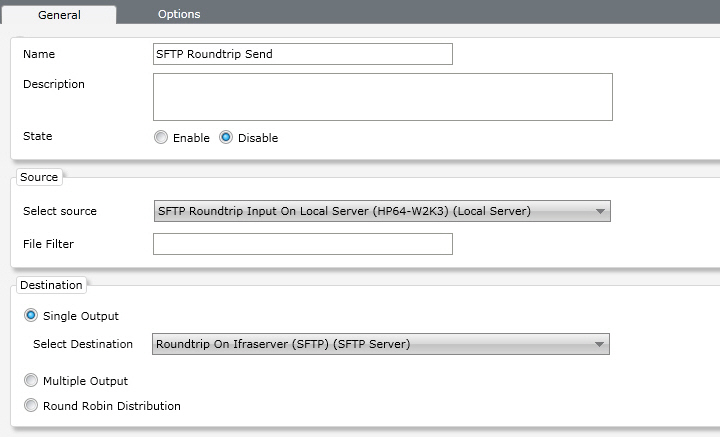
Name: Name your channel in this field.
Description: If you need to specify further what the channel does, type a description here.
State: The state determines whether the channel should be actively looking for files to transfer or be turned off. A disabled channel can easily be enabled by switching to enabled here or by enabling it in the Operations Center.
Source: Using the drop-down list, choose a server and a folder that you would like to use as the source for your channel. You can optionally apply a file filter (e.g. *.doc) to determine specifically which files should be transferred. Without a file filter, the channel will transfer all files in the source folder. If you would like to add several file types, separate them using a space or a comma, thus: *.jpg *.tif *.png
Destination: When setting a destination you can choose whether the channel should have a single or multiple outputs. or to alternate between different servers using a round-robin distribution method. If you choose to use multiple outputs you can select a destination folder from the drop-down list and then click on Add to add another output. You can add as many different outputs as you like.
Important:
When a channel has several destinations, if one of the destinations fails, Connect may transfer the same files several times to the other destinations.
Channel options
Note: The below options are carried out in the order in which they are listed in the interface and will affect the folder structure in your destination.
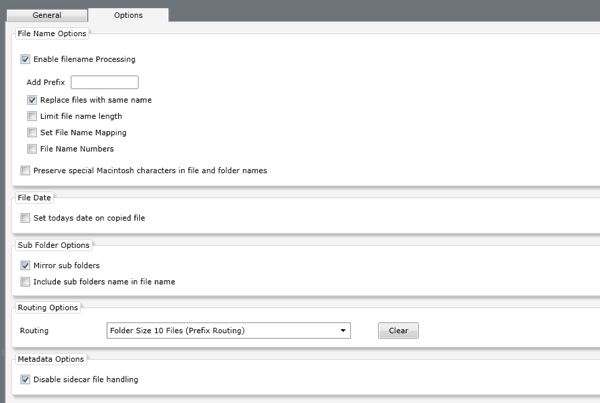
Enabling filename processing gives you access to special properties relating to how file names should be handled.
Add Prefix: Lets you add a prefix to the files processed in the channel when they are stored in the destination folder. You may want to add a separator character also to keep the prefix apart from the filename. (Such as: prefix_ to create prefix_filename.jpg in the output.)
Replace files with same name: When this option is checked, Connect will replace any file with a duplicate name in the output folder. Otherwise, it will add a running number to the file automatically.
Limit filename length: This option can be used to limit the maximum number of characters in the filename, including its extension. Connect will then first attempt to limit the original filename to the specified number of characters and then add a running number to the filename if that is required to make the filename in the output folder unique.
Set file name mapping: File name mapping can be used to have Connect replace characters that are illegal in some systems. Simply type in the character that you want to change in the file name and choose another character or a whole string to replace it with.
File name numbers: Lets you control how automatic file numbering is applied to file names incrementally. If you choose to keep the entire file name the running number will be appended after the file name, increasing the file name length. If you choose to keep only part of the file name, you can choose how many characters you would like to preserve. Finally you can choose not to keep the original file name at all, in which case the output files will be named according to the running number only.
Preserve special Macintosh characters in file and folder names: If you wish to preserve special characters ine file or folder names that are only valid on Macintosh systems, tick this option. Keep in mind that doing so may create file and folder names that appear garbled on Windows and Unix systems. If you want to preserve compatibility with Windows and Unix, do not check this box. Connect will then map all illegal characters to an underscore (_).
If you would like to stamp all processed files with the date of the time of processing, select the option Set today's date on copied file. If this option is left unchecked, the files' original file date will be retained.
Subfolder options are only available if the source folder has been set to include subfolder scanning. You can the choose to mirror the entire folder structure of the source folder in the output folder, and you can choose to add the subfolder name to the filename. When adding the subfolder name to the filename, you can also specify a separator character to split the folder name and file name in the output file.
By choosing to Mirror sub folders, the folder structure inside the channel's source folder will be preserved in the output folder.
You can also choose to Include sub folder names in file name, which implies that the names of the subfolders in the source will be added to the beginning of the file name when the files are transferred to the destination. When enabling this option you can choose a custom character to separate the folder name from the file name. Note that the subfolder name will be added to the file name before any prefix that you specify using the Add Prefix feature above, so that the output file could e.g. be named subfolder-prefix-filename.jpg
Finally, you can choose to apply a routing method to your channel. This will affect how the transferred files are stored and sorted in the destination folder. Read more about routing options here.
Disable side car handling: This option requires a little explaining:
Certain file formats do not allow a FotoWare system to store embedded metadata inside the file itself. To be able to store metadata in these files, a "sidecar" file can be made. It will be named the same as the file it accompanies, only with the extension .xmp, and handled transparently by the system to accompany the master file it "belongs" with.
By default, the the Disable side car handling option is checked. This means that an .xmp file is treated just like any other file, and is not regarded as "belonging" to a master file. However, if you want to make sure that sidecar files are treated as just that - as belonging to a master file - you should remove the checkmark next to this option. That way, all operations that Connect applies to a master file will also be applied to the accompanying sidecar file, including renaming, routing etc.
Remember to click the Save button in the lower-right corner when you have made changes to the configuration.