Please refer to the appendix to learn how to configure the text editor to utilize a database connection.
This chapter will explain how you can configure a database connection using ODBC in FotoStation. Such a connection can be used for looking up text records a database for insertion into the metadata in the files in your archive and for writing metadata back to the database. It can also be used for importing text from a database for application to files in a certain folder.
Creating a database connection
Connecting FotoStation to a database is done in the program configuration. Access it by opening the File menu (FotoStation Pro menu on the Mac) and choosing Configuration, then expanding the Metadata node in the configuration tree and clicking on the Database connections node. If no connection has been made previously, FotoStation will suggest creating one.
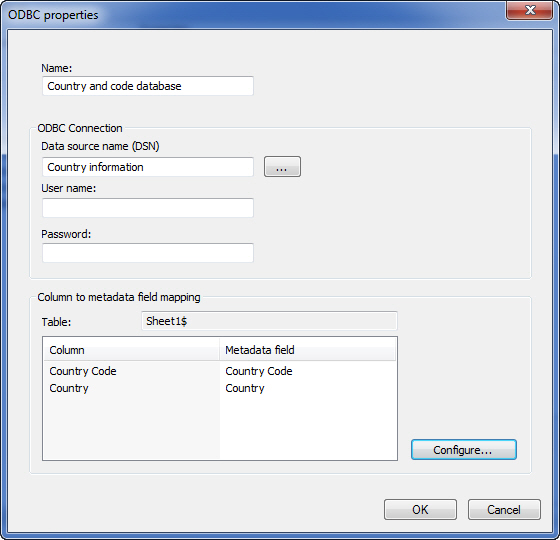
A connection to an existing database is made by specifying a Data source name (DSN). Configuring a System DSN is beyond the scope if this manual, but it can be done in the Windows Control Panel, by opening Administrative Tools and choosing Data Sources (ODBC).
Having named the connection in FotoStation and specified a DSN and username/password (if required), you can click on the Configure button to set up mapping between database and metadata fields.
Mapping database and metadata fields
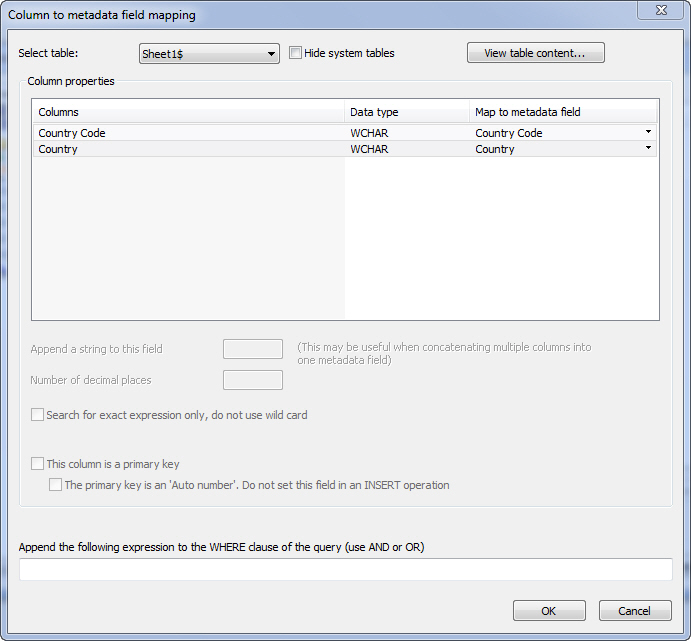
The screenshot above shows the dialog that lets you set up mapping of database columns (to the left) to metadata fields (right). Doing his will allow a text editor in FotoStation to look up a certain database field and insert its contents in the associated text field. By mapping several columns to metadata fields, FotoStation can fill in associated fields from the same record automatically. In the example above the database contains a list of countries and associated country codes. By mapping these fields to the Country and Country Code metadata fields, as shown above, and making slight changes to a text editor, it is possible to look up either database field and fill in the associated field automatically.
If you want to be able to enter information in a field in the FotoStation text editor and write it back to the back to the database, you will have to specify a primary key. Select a field that is unique, for example one containing a running number.
To save the ODBC connection, click on OK and close the FotoStation configuration dialog altogether.
Configuring the text editor for database lookup
Having set up a connection you need to make some changes to one of the text editors to make use of the database connection. In this example we will make changes to the FotoStation 4.5 Style editor that comes with FotoStation. You can change the properties of this text editor by going into the program configuration, expanding the Metadata node in the program configuration and then selecting Dialog builder. Now click on the FotoStation 4.5 Style editor and click on New to use this editor as a template for the modified editor that we will be making.
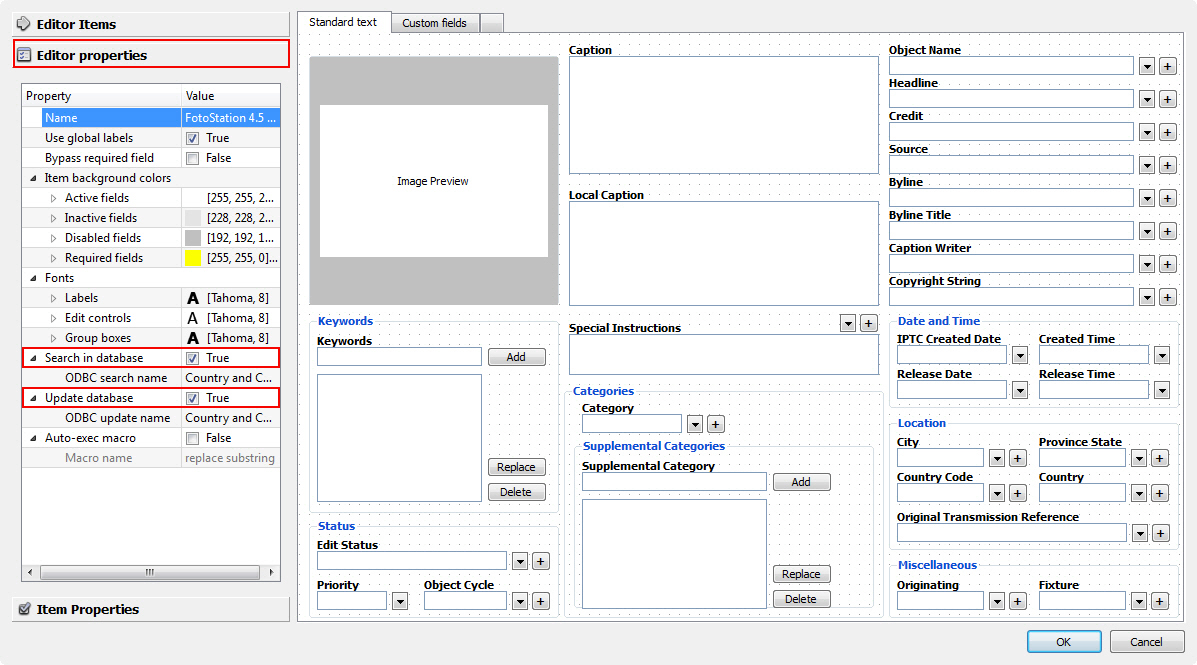
First off, we need to enable ODBC lookup in the editor. To do this, click on the Editor Properties node in the left side panel. There you will find a number of properties, one of which is Update Database. Select the checkbox for that field so the value changes to True. (See above screenshot.) If you have more than one System DSN set up on your computer you can also choose which database you want to connect to.
If you also want to be able to write metadata entered in the text editor fields back to the database, you should also select Update database. Using this feature requires you to define a primary key; this can be done in the ODBC configuration as described above.
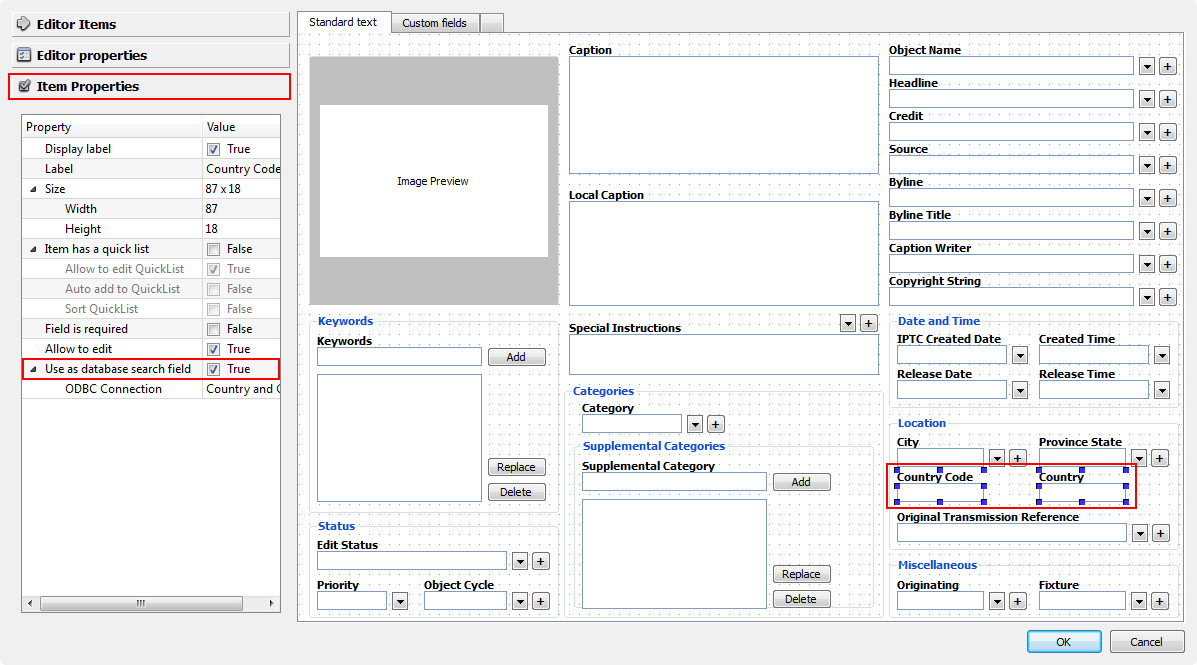
Now you need to select the fields in the editor that should be allowed to search the database and/or write information back to it. This is done by pressing Ctrl while clicking on the Country Code and Country fields in the layout (see above screenshot). Then switch to the Item Properties page in the left panel and select the checkbox labeled Use as Database search field.
Now you have set up a link between the database columns and metadata fields and enabled the editor to make use of the database connection. Finally, switch to the Editor Properties page and change the editor name to avoid confusion with duplicate names in the list of available editors. (Remember you cloned an existing editor.) Then click OK to store the new editor and you're done.
Using text editor with database search fields
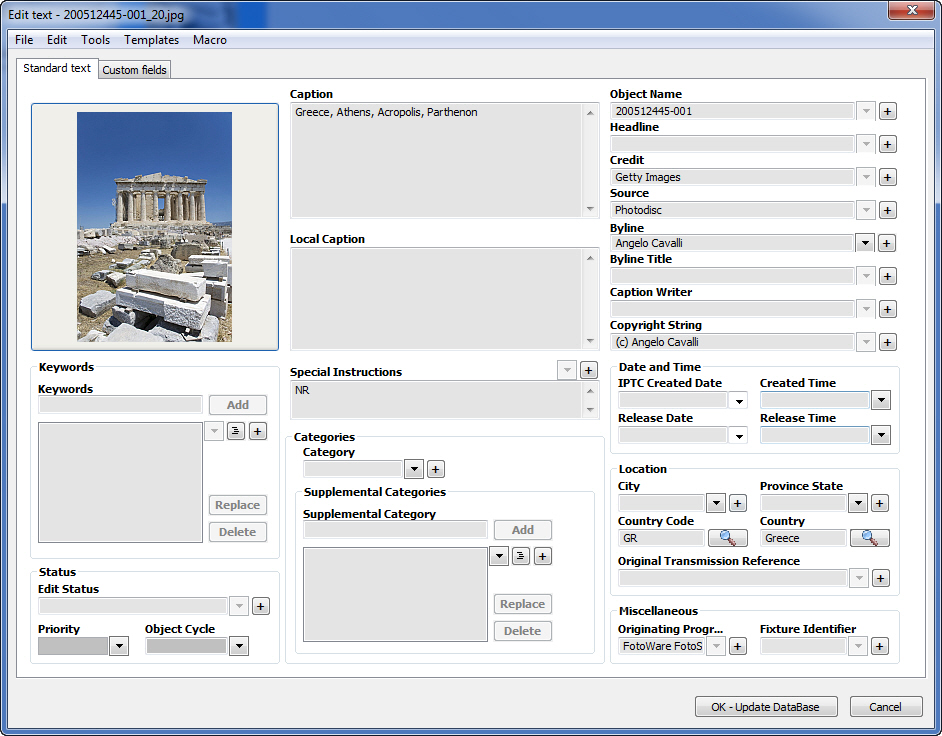
The above screenshot shows the editor where the Country and Country code fields are set up to search database fields. By typing information into the Country field and clicking on the magnifier button, you can search the database for matching information and insert any of the records found into the text editor field. A search for “An” in the Country field could for example result in the following:
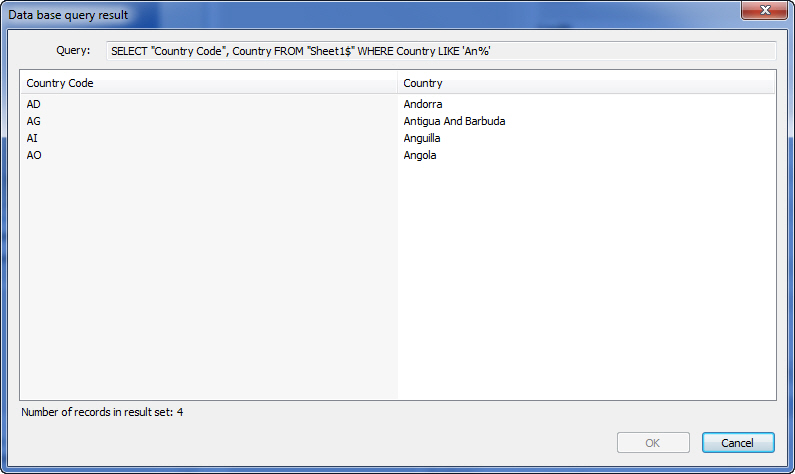
If only one matching record is found in the database, that record is automatically inserted. Since Country and Country Code are part of the same record set in the database, the Country Code field in the text editor is automatically filled in when choosing a country.