The Slideshow option is an excellent way of browsing through images, both for viewing and selecting images that require editing, cropping, or aren’t up to your required quality level, etc.
![]()
To run a slide show, select some images from the current source (select all images that are shown in the image window by using the shortcut key Ctrl+A (Command–A on the Mac). Note that the order in which you select the images will be reflected in the slide show. Then click on the Slideshow button shown above. The slide show window will open, giving you the opportunity to customize your slideshow.
Tip: You can start slideshows immediately using the last chosen settings by making a selection and pressing Shift-Enter.

Display: If your computer has more than one available display, you can select which one you would like the slide show to run on. Select the desired display from the dropdown list.
Margins (in Pixels): If desired, you can have a margin (the margin’s color is the same as the Background color) around the images in the slide show. Enter the size (in pixels) for the margin into the Left/right and Top/bottom fields. If you don’t want a margin, make sure that the size is set to 0 for both the Left/right field and the Top/bottom field.
Clip Image to Fit the Presentation Area: When viewing images using the Slide show option, you will see that some images won’t fit perfectly on the selected monitor. This is simply because images normally don’t have the same size as the monitor screen . If the image is too large, FotoStation will scale down images so they fit inside the presentation area on the monitor. This will lead to “empty” space at the top and bottom or left and right side for most of the images.
If the image is almost the same size (or can be scaled down to almost the same size) as the monitor resolution, you can choose to remove a small part of the top and bottom (or left and right side) of the image, so that the image will fit perfectly on the screen and you avoid the empty area. This can be done by checking the Clip image to fit the presentation area checkbox.
Background Color: Click on this button and select the color that should be used as background. This color is used as background when the image doesn’t fit perfectly inside the presentation area. (See the Clip image to fit the presentation area subtopic for more information.) The color will also be used if a margin has been set for the presentation (see the Margins (in pixels) subtopic for more information).
Fast Mode: If this option is selected, it will be faster to go through the images. The slide show will go faster since the images will be shown on the screen with a slightly lower quality. Note that this only affects the current slide show. The quality of the saved images is not changed.
Change Frames Automatically: Select this option if you would like the images to change automatically. Make sure that you also specify how long each image should show on the screen before changing to the next image. The time is specified in seconds in the box below.
If you would like to stop the slide show, but not exit it, press the S key. The slide show will stop, showing the “pause” sign in the upper left corner of the slide show. Press the S key once more to resume the slide show. When Change frames automatically is not selected, you must use the arrow keys to change slides.
Continue from Start after Last Frame: Select this option if you would like to automatically restart the slide show after the last image has been shown. If this option is not selected, the slide show will end automatically after the last image.
Transition Effect: If the Fast mode option is not selected, you can select the transition effect you would like to use when switching between images. Select the desired effect from the dropdown menu. If you don’t want a transition effect, select None. On the Mac, you can choose how long you would like each transition effect to last (in seconds) by changing the option Time for transition. Please note that this is an option that depends on your hardware. If the Transition effect option is disabled, your Mac doesn’t support this option.
Display Logo
It is possible to show a logo (or other image) with all the images selected for the slide show. (Note that the logo will not be inserted into the saved image. It will only be shown when using the slide show.)
File name: Click on the browse button on the right-hand side of the field to locate the file you would like to use as logo file.
Alignment: Select the logo’s vertical and horizontal alignments. The choices are Left, Center and Right for the vertical alignment and Top and Bottom for the horizontal alignment. Note that the logo is aligned according to the monitor.
Transparency color: If the logo has a transparency color (i.e. if a specific color in the logo image should be transparent) that differs from the Background color, then the checkbox should be selected and the transparency color selected by clicking on the Transparency color button.
Show Image Text
It is possible to include text information together with the slide show images. If you would like text to be included, select the checkbox. Note that you can also create your own template that will appear in the dropdown list if it is saved in FotoStation’s Text templates folder.
Template: Select the desired template from the dropdown list.
Height: Select the height of the text field. Make sure that the text field is large enough for the text template.
Save as Movie (Windows Only):
If you would like the slide show to be saved as a move, click on this button and enter File name, where to save the file and the size of the movie.
During the slide show, you have the opportunity to select images. If you press Spacebar on the keyboard, the image that you are currently viewing will be selected. The selection is illustrated by a frame around the image.
By using this functionality you can select the images that you would like to keep. One approach could be to start the slide show with all images (Ctrl+A on Windows / Command–A on the Mac to select all images and click on the Slideshow button to start the slide show) and then press Spacebar to select each image that you think you might want to keep.
When the slide show is over, the following window will appear:
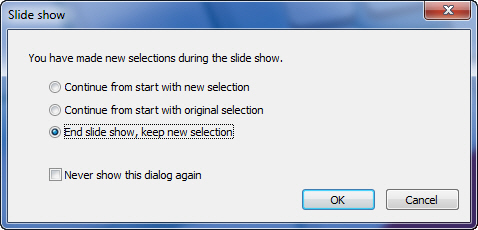
If you select to Continue from start with new selection you can go through the images once more, but now you will only see the images that you wanted to keep in the first round. No images are now selected. You can once more make an image selection and remove images that you don’t want to keep.
When you are happy with all your images, you should select the End slide show, keep new selection. The slide show ends and the images that you chose to keep are still selected.
Note that the functionality is a bit different for the Mac version of FotoStation. On the Mac, the sheet that appears looks like this:
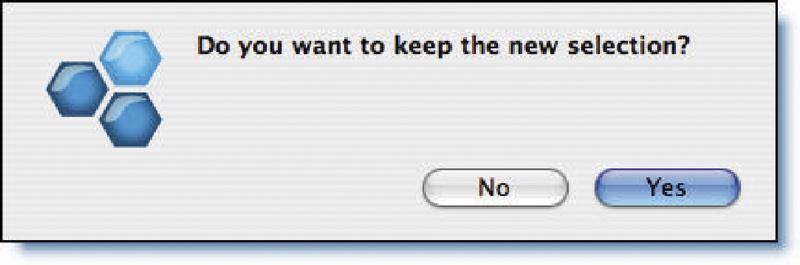
If you choose Yes, the images you selected during the slide show will stay selected after the slide show is over. If you don’t want to keep the new selection, choose No.
You can view only the selected files by clicking on the Selection button and selecting Show Selected as shown in the image above. (You can use the shortcut key Alt+A on Windows / Shift–Command–A on the Mac instead of the menu.) Then, only the selected files will show up in the image window.
For example, you can now choose to move these files into a specific folder or to edit the images using the Edit function. If, on the other hand, you would like to keep the selected images, but delete the other images, you can select the Invert selection option from the menu (or use the shortcut Shift+Ctrl+I in Windows / Shift–Command–I on the Mac). Select Delete (Move to trash on the Mac) from the Edit menu or simply press the Delete key (Command–Backspace on the Mac). The operation works as it would if you deleted the file directly from Windows Explorer or the Mac Finder, i.e. if the file you deleted was on a local disk it is placed in the system Recycle Bin (Windows) or Trash (Mac). If the file was on a server (this will typically happen when you work with an Index Manager archive), then the file is deleted immediately and can’t be recovered. As a general rule, always think twice before deleting files.
If you are working within a Project side panel, the files are removed from the project and not from your computer. You will have to select the Delete files permanently checkbox in the window that appears, to remove the files from the computer.
Provided that a Classify view has been chosen you can start a slide show and use the keyboard shortcuts (Ctrl-<number> / Option-<number>) to classify files during the slide show.