Before installing Index Manager 7.0 on your server:
1. Make sure the server meets the system requirements set forth in the previous topic.
2. Configure your network to allow communications between the server and client.
3. Install Index Manager on your server and configure it using the Operations Center web interface.
The details surrounding these steps are outlined below.
Since FotoWare 7.0 Service Release 2, the installers automatically take care of installing the required components on the server. The below link to the FotoWare knowledge base explains which components are installed and how you can add them manually, if such is required.
http://www.fotoware.com/en/Support/kb/View-Knowledgebase-Article/10325/
Having set up IIS you should make sure the server allows incoming client connections and that Index Manager can communicate with the log server.
Communication between Index Manager and its clients uses TCP port 7000, which must be opened in the server's firewall. This is also necessary for remote administration of the Index Manager server through a remote web browser.
To make it easy for administrators and operators to access the Operations Center and the configuration panels for all installed server applications, we recommend that you enable single sign-on. This is achieved by using Internet Explorer as your web browser and adding the Operations Center server to your list of local intranet sites.
Also, as previously stated in the system requirements, Index Manager communicates with the FotoWare Log Server using UDP port 7000. You should therefore make sure that no other services on the server claim this port and interrupt the logging service. Microsoft's DNS server can typically interfere with this port since it can be configured to use an arbitrary port. Hence, if you are using Microsoft's DNS server, you should make sure that it has been explicitly set not to not allow connections on UDP port 7000.
When installing FotoWare server software on a Windows 2008 server, the default User Access Control settings on the server may need to be modified by changing a setting in the Local Security Policy. An explanation will be in order:
As outlined in the System Requirements, the process account that is used for accessing files on the server or domain needs to be a member of the local Administrators group on the server where the FotoWare software is installed. It also needs to be a member of the FotoWare Administrators group that is created on the server during installation of the Operations Center. (The Operations Center installer will automatically put all members of the Administrators group into the FotoWare Administrators group. You can remove users that you do not want to be able to configure FotoWare services by manually removing them from the FotoWare Administrators group after installation.)
However, Windows Server 2008 has different User Access Control settings for the built-in Administrator account than other users that are subsequently added to the Administrators group. Specifically, the built-in administrator does not need to validate administrative tasks (what Microsoft calls "Admin Approval Mode"), while users that you manually add to the Administrators group will need to do so by default.
Hence, if you create a new user on the local server, or a domain user for that matter, that you add to the Administrators group and the FotoWare Administrators group, this user will by default have Admin Approval mode switched on. This will interfere with the FotoWare services causing them to malfunction, so you will need to modify the Local Security Policy on the server to disable Admin Approval mode for all administrators. A step-by-step explanation follows. You can change this setting either before you install the FotoWare software or after, but you will not be able to configure or successfully run the FotoWare services until you have done so.
Open the Windows Menu (Start Menu) and choose Administrative Tools | Local Security Policy
Expand Local Policies, then click on Security Options.
Scroll down to near the bottom of the list where you find an entry called User Access Control: Run all administrators in Admin Approval Mode.
Double-click this entry and change its setting to Disabled. Then click OK to save the changes.
Restart the server for the changes to take effect.
Before installing (IMPORTANT!)
If you are upgrading from version 6.0 to version 7.0, you must stop all FotoWare-related services on the server:
Stop all running FotoWare programs
Open the Start Menu, choose Administrative Tools and then choose Services.
Locate and stop all FotoWare services.
It is advisable to back up your existing configuration before performing the upgrade. If you're running on a virtual server, it is you can make a snapshot of the system to allow reverting if you run into problems that render your system unavailable after the upgrade. If the software runs on a physical server you can back up the server using your server's backup software.
Whereas FotoWare Version 6.0 server applications used Microsoft .NET Framework version 2.0, the FotoWare Version 7.0 applications require .NET Framework 3.5, which will be automatically downloaded during installation if it has not already been installed on the server. This installation may require a server reboot. If that happens during your installation, choose Yes to reboot and wait for the server to restart. Then log on and restart the installer.
When installing Index Manager you will get the option to install Microsoft SQL Express 2005. The SQL server is used for the Project Server, which is installed automatically alongside Index Manager and which serves shared projects to FotoStation and FotoWeb clients. If you already have configured a Microsoft SQL server in your network that you would rather use, you can skip the installation of the SQL Server Express. However, you will then need to manually configure your SQL server to allow FotoWare server projects. Information about how to do this can be found in this Knowledge Base article on our website: http://www.fotoware.com/en/Support/kb/View-Knowledgebase-Article/?articleId=10306
Installing Index Manager can be done by inserting the CDROM that came with your purchase or by downloading the latest version of the software from the FotoWare website (http://www.fotoware.com/support - click on the Download updates link to get to the download area.)
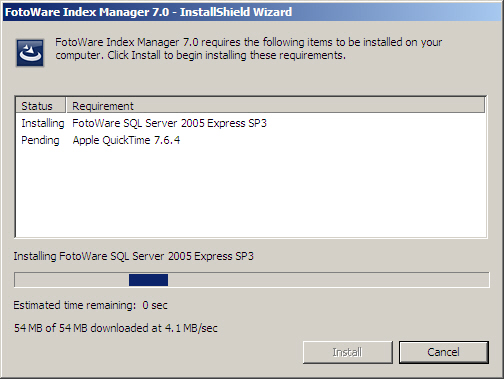
When starting the installer, you may be prompted that additional components are required. If possible, these will be downloaded directly from the FotoWare website before the installation continues, as shown in the below screenshot. (Note that the installation of these additional components may require some time and possibly some user intervention.)
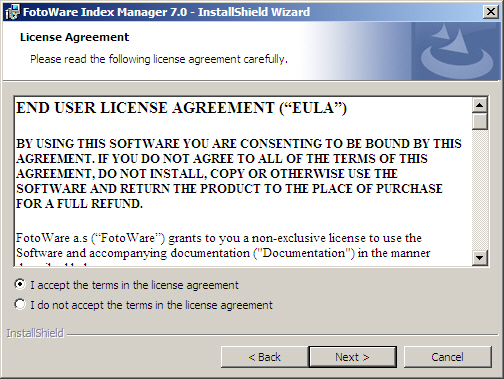
Next you will be presented with a welcome screen. Simply click on Next to proceed, then read and agree to the End-User License Agreement:
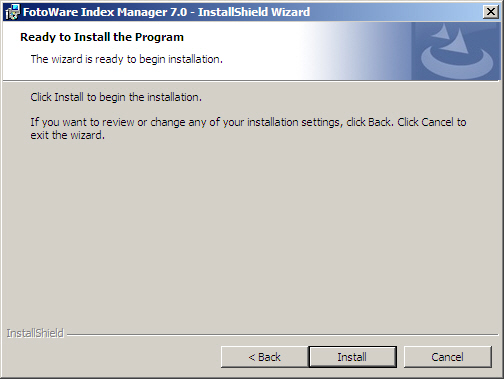
Finally click on Install to start installing Index Manager.
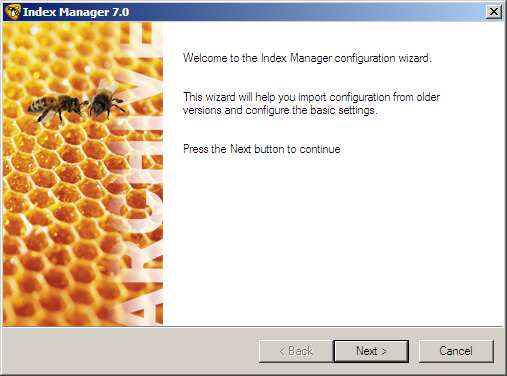
When the installer finishes, the Index Manager Configuration Wizard lets you set basic properties pertaining to the server accounts used by the application. Click on Next to proceed.
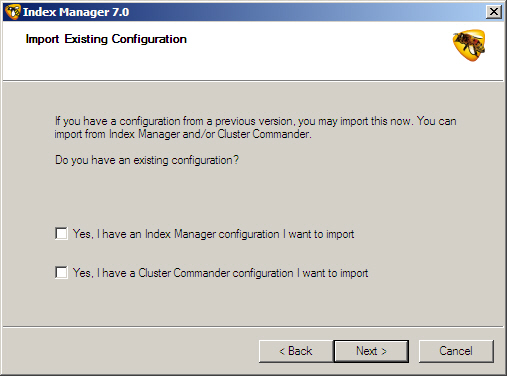
If you are upgrading from an older Index Manager server you can now choose to import the old configuration and convert it to the new format used by Index Manager 7.0. Otherwise, just leave the checkboxes open and click on Next.
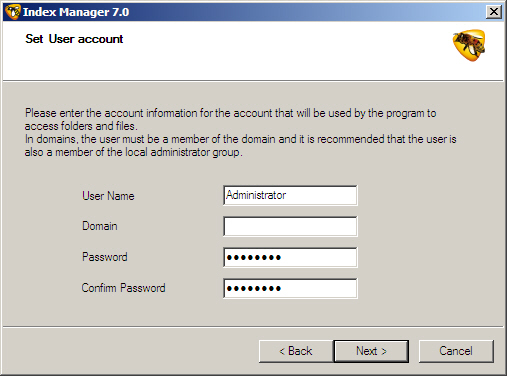
Now set the user account that Index manager will use for reading and writing to the files in the archive. This must be a local system administrator.
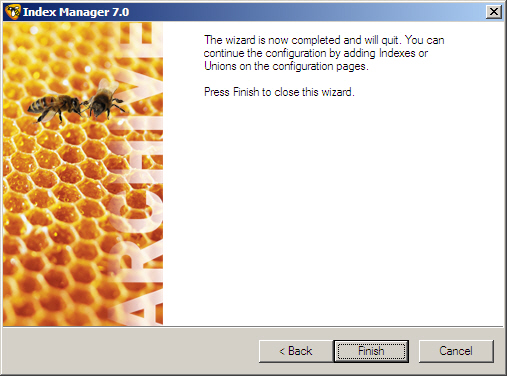
Finally, click on Finish to complete the configuration wizard and end the installation process.
When the installer finishes, you can access and set up Index Manager by double-clicking on the FotoWare Operations Center shortcut on the desktop. The URL to the site can also be typed into any web browser on the network, and you can enable single sign-on so you don't have to authenticate manually every time you access the configuration site. Please refer to the Operations Center documentation for more information.