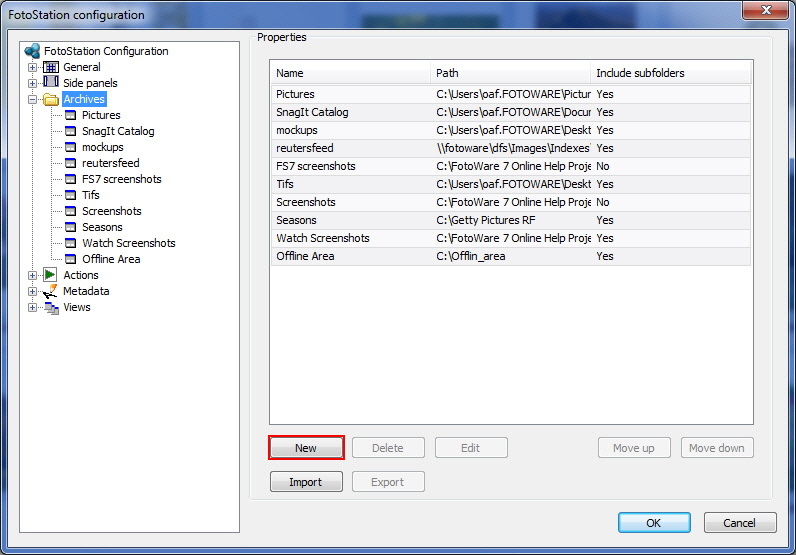
Where: Expand the Archives node in the configuration tree.
Often, an archive is a shortcut or an alias to a local or a network folder that appears in the Archives side panel in FotoStation. But unlike a regular system folder, an archive can be configured in a number of ways to display its contents the way you want. FotoStation's Archives can also point to less tangible locations, such as Index Manager indexes or remote FotoWeb archives.
Expand the Archives node in the configuration tree. Then click on the New button to create a new archive.
Other ways to create an archive
To create an archive from the main window in FotoStation, right-click a blank area inside the Archives side panel and select Create archive, or open the Archives menu and choose Create archive…
You can also right-click a folder when browsing the Desktop side panel and choose Create archive to make an archive of that folder. This way, the path to the folder will be filled in automatically in the Archive properties dialog.
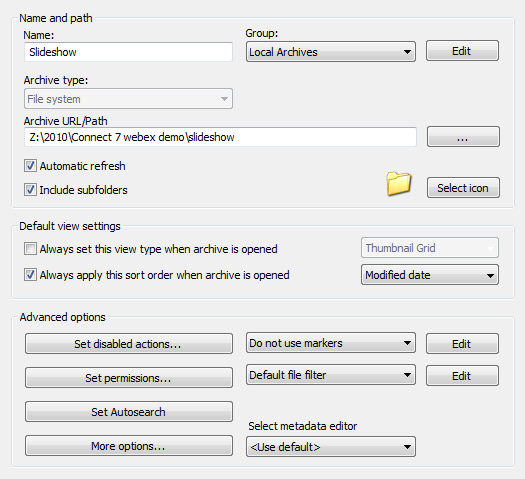
Archive name, Group and Path
Depending on how you created the archive, the archive name and path may be filled in. You may change the archive name to any suitable name that describes it. If the path is not already filled in, enter the path manually or click the on Browse button to locate the folder. When creating archives of network folders, we advise Windows users to locate the folder via the Network Neighborhood, since that will ensure that FotoStation uses a UNC path to the files. This will make exporting the archives and sharing configurations between several workstations easier since FotoStation won’t have to rely on mounted network disks and drive letter mapping.
An archive is always assigned to a group. Archives belonging to the same group will be listed under the same group header in side panels containing archives, given that group headers are enabled on the side panels’ properties page.
Archive type
The archive type lets you select the type of connection you are making to the archive. To connect to the local file system or the Windows network using UNC paths, choose File system.
To connect to Index Manager 7.0 archives, choose either of those in the list and either type in the path to the archive or use the browse button (...)to locate the server and the archive you want to connect to.
When connecting to an Index Manager 7.0 archive you will need to know the server's hostname or IP address to connect. Simply type in the hostname and the connection dialog will list all archives that are available on that server. You may be required to authenticate with a user name and password.
Note: If your Index Manager server has been set up to use another port than the standard port (7000), you will need to specify the port number along with the hostname, for example like this to connect using port 7001: hostname:7001
A connection can also be made to a FotoWeb archive over the Internet by choosing FotoWeb in the list. To locate the server, click on the Browse button (...) and then type in the url to the server. (For example www.servername.com - you don't have to worry about the subsequent path.) By default, FotoStation will attempt to connect as a Guest user, but you can click on Change Account to set your user account information for the server. A list of available archives will then be listed and let you choose which one you would like to connect to, as shown to the right.
Finally, you can connect to an Archive Agent. FotoWare’s Archive Agent interface is an open standard for making document archives accessible from any other application. The archive agent interface also makes it easy for third-party applications to search in archives without writing interfaces to proprietary software. FotoWeb publishes an archive agent for each archive in the system, which makes it very easy for applications that integrate with FotoWeb to find files, get previews and download these files. So in principle, the Archive Agent connection is the same as the FotoWeb connection, only that with the FotoWeb connection we can assist the user in finding an archive with the Browse function, as described above. For more information about the Archive Agent, please go to the Documentation area on the FotoWare website.
Connections to Index Manager 7.0, FotoWeb and the Archive Agent require user authentication. This information is stored in FotoStation to allow easy access to the archive in the future. If you would like to clear the login information for an archive, for example to authenticate as another user, you can easily do so by opening the File menu and choosing Log Out.
Tip: As you will see later on you can choose whether group headers are shown or not. Even if you decide not to show group headers, we recommend that you always assign archives to different groups, since this will make it easier to manage the archives in Archives panels.
If your servers have been configured to use secure connections you may not be able to connect to the server over a non-encrypted connection. In this case, you will have to type in fwps:// before the hostname to indicate that you wish to use SSL. Your server url may for instance look like this: fwps://indexmanagerserver.domain.net
An alternative way to connect to the server is using its assigned SSL port number to specify that you want to use a secure connection. For instance, the string could look like this, assuming port 7001 is used for SSL: indexmanagerserver.domain.net:7001
Additional Archive Properties
Automatic refresh: Enable this option to automatically update the view when files are added, modified or removed from the archive.
Include subfolders: Selecting this option makes FotoStation scan through all subfolders within the archive’s top folder.
Tip: When browsing an archive you can click on the little + sign next to the archive icon to list all subfolders within the archive. Then click one of the subfolders to display only the files within that folder.
Always apply this view type when archive is opened: Select this option and choose a view type from the dropdown list to set a default view type for the archive. FotoStation will switch to this view type every time you access the archive. If no default view type is set (i.e. this option is not selected) FotoStation will apply the currently active view to the archive when it is opened.
Always apply this sort order when archive is opened: Select this option to make FotoStation sort files a certain way when accessing the archive. Choose a file sorting method using the dropdown list. If no default sorting method is chosen, FotoStation will sort the files in the archive according to the currently active sorting method.
Set disabled actions: To disable access to certain actions when this archive is open, click on this button. Then select the actions that you want to disable and click OK. The actions will be grayed out and inaccessible, but not disappear completely from the Actions side panel.
Set Autosearch: The Autosearch feature makes FotoStation perform an automatic search every time the archive is opened. All subsequent searches will be performed within the search result of the original autosearch. Click on the button to create a search query. Refer to the Searching chapter to learn how to create advanced search queries. Keep in mind that performing an automatic search every time a large archive is opened can take some time. To utilize the full potential of this feature we recommend connecting FotoStation to an Index Manager search server, since Index Manager gives you added benefits such as synonym searching and word stemming.
File markers: File markers are visual indicators on thumbnails and previews that can be used to identify files that meet certain criteria. For example, an indicator can be used to show that a file has been printed or contains notes. Please refer to the Configuring File Markers chapter to learn more.
File filters: File filters are use to control which file types FotoStation should include or exclude in thumbnail view. The filter can be turned off completely, or you can choose between three predefined filters in the dropdown menu: The Default file filter excludes executables, windows thumbnail files, text files and temporary files. The Basic image filter includes JPEG, TIFF, EPS and PSD files while excluding all other file types. The Images and media files filter includes all the aforementioned image file types as well as GIF and bitmap formats, MP3 files, ASX, MOV video clips and Windows media audio and video formats. You may also modify the filters or create a custom filter from scratch by changing one of the unused filters. Please refer to the Configuring File Filters chapter to learn more.
Select metadata editor: Use the dropdown list to choose the default metadata editor to use when you work with files in this archive. The chosen editor will be used for all functions involving use of the text editor in the archive. You can of course still change editors using the text editor menu. If you choose to <Use default> FotoStation will remember the last used editor for different functions. For example, the editor last used for adding metadata to several files may be different from the one used for captioning single files.
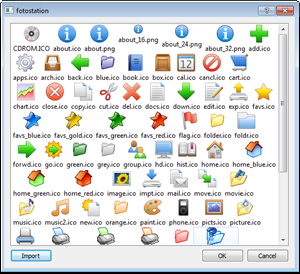
If you would like to add a custom icon to an archive or an action you can do so by clicking on the Select icon button. FotoStation comes with a number of included icons that you can choose from. You can also import your own icons if you have for instance purchased icons from a collection or made your own using icon creator tools. To do so, click on the Import button as shown in the screenshot above and choose the icon files that you want to add to your configuration. When imported into FotoStation, the files are converted to png format and stored with your active configuration. Typically FotoStation is set up with a per-user configuration, which means your icons are stored in C:\Users\[username]\AppData\Roaming\FotoWare\FotoStation\Configuration\Archive Icons.
These icons can of course also be used for FotoStation's Actions.
Should you choose to back up your configuration these icon files will also be included in the backup set.
By clicking on the Set permissions... button you can set additional permissions related to how FotoStation lets you browse and add files to the archive.
Allow subfolder browsing: By enabling this option, FotoStation displays a little + symbol next to the archive that you can use to expand the subfolder structure inside the archive and browse the contents of individual subfolders. You can also right-click in the subfolder structure to create additional subfolders, or to rename or delete subfolders.
Allow file delete: By default users are allowed to delete files in the archives, However, by changing this option you can make it impossible for users to delete files.
A note about deleting files: Files that are deleted from local drives are put in the system's Recycle bin. Files that are deleted form a network volume are deleted immediately.
Allow saving and dropping files in this archive: If you do not want users to be able to drop files into the archive or to save files in the archive using e.g. actions, you can disable saving of files in the archive here. If your archive is an Index Manager controlled archive, you can specify one of the index document folders here to tell FotoStation where it should store the files.
Automatically create new subfolder: When his option is checked, FotoStation will cerate a new, unique subfolder inside the path specified above every time files are dropped into the archive. Disable this action if you do not want to create subfolders inside the specified folder.
When dragging and dropping files between archives, FotoStation will by default always copy files from the source to the destination. However, if you want the drag and drop operations to behave the same way as when dragging and dropping files in Windows Explorer, you can force this on a per-archive basis. Simply open the More options dialog and select Use same behavior as File Explorer... This way, when dragging and dropping files within the same volume, FotoStation will default to moving the file, while you can use the Shift key as a modifier to toggle between moving and copying before releasing the mouse button and performing the operation.
Mac users can toggle using the Alt key when dropping files to the Finder, while the Command key should be used for toggling when dropping on an archive internally in FotoStation.
Enabling drag and drop to FotoXStream 3
If you intend to use FotoStation with FotoXStream 3, you need to click on the More options button and select Use FotoXStream 3 compatible drop. When using a newer version of FotoXStream, there is no need to enable any additional settings.
When browsing an Index Manager archive using FotoStation you can limit the maximum number of files FotoStation can browse to increase performance. This can be done by clicking the More options... button and entering the maximum number of files to show in the Index browse size field. When limiting the maximum number of files that can be browsed this way, FotoStation will always display the newest files. Note that a browse and search limit can also be set on the Index Manager server, so the only reason why you would want to change this setting in FotoStation is if the client appears to have trouble coping with the large number of files.
To easily move archives between groups, select the archive in the main program window and drag it to another group, then drop it on the group header of the new group. Group headers must be turned on in the side panel’s properties page for this to work.
Exporting an existing archive
If you would like to export a configured archive (not the actual files in the archive, but the path to the folder and all related settings) to a file for use on another computer running FotoStation, this can be done by selecting the Archive node in the configuration tree, selecting the archive you want to export and clicking on the Export button. The archive with all its settings can then be saved as a file which can be imported on another FotoStation workstation in the network.
To ensure that folder paths are correct on the target workstation, you should make sure to always use UNC network paths in Windows when entering the path in the archive properties. Alternatively, when configuring the archive, browse to it through the Network Neighborhood. This will ensure that FotoStation uses the UNC network path in the archive. (A UNC network path typically has this syntax: \\servername\folder)
If you want to easily export an archive to a file in FotoStation, you can do so from the main program window. Right-click the archive that you want to export, then choose Export settings in the context menu. This feature is also useful if you need to create several archives with the same properties set, but for different folders. By exporting a “template” archive, you can import it, rename the new archive and change its path.
Importing an archive from a file
To import an archive from a file, open the program configuration by choosing the File menu, then Configuration. Expand the Archives node in the configuration tree, then click on the Import button. Locate the archive file to import (it has the extension .archive), then click OK. The archive with all its settings, including group belonging, is imported and the archive appears in the Archives side panel when you close the configuration dialog.
To easily import an archive file to FotoStation, select the Archives side panel, then right-click an empty area in the side panel. Choose Import archive item from the context menu, locate the archive file to import (it has the extension .archive), then click OK. The archive will now appear on the Archives side panel in whichever group it originally belonged to.
To delete an archive, click on the Archives node in the configuration tree, then select the archive to delete in the list to the right and click on the Delete button below.