This topic gives you an overview of the FotoStation window. Please note that throughout this documentation, we are assuming that you are using a two button mouse with a scroll wheel. If you are using a one button mouse on the Mac, note that a right-click is achieved by Ctrl–clicking.
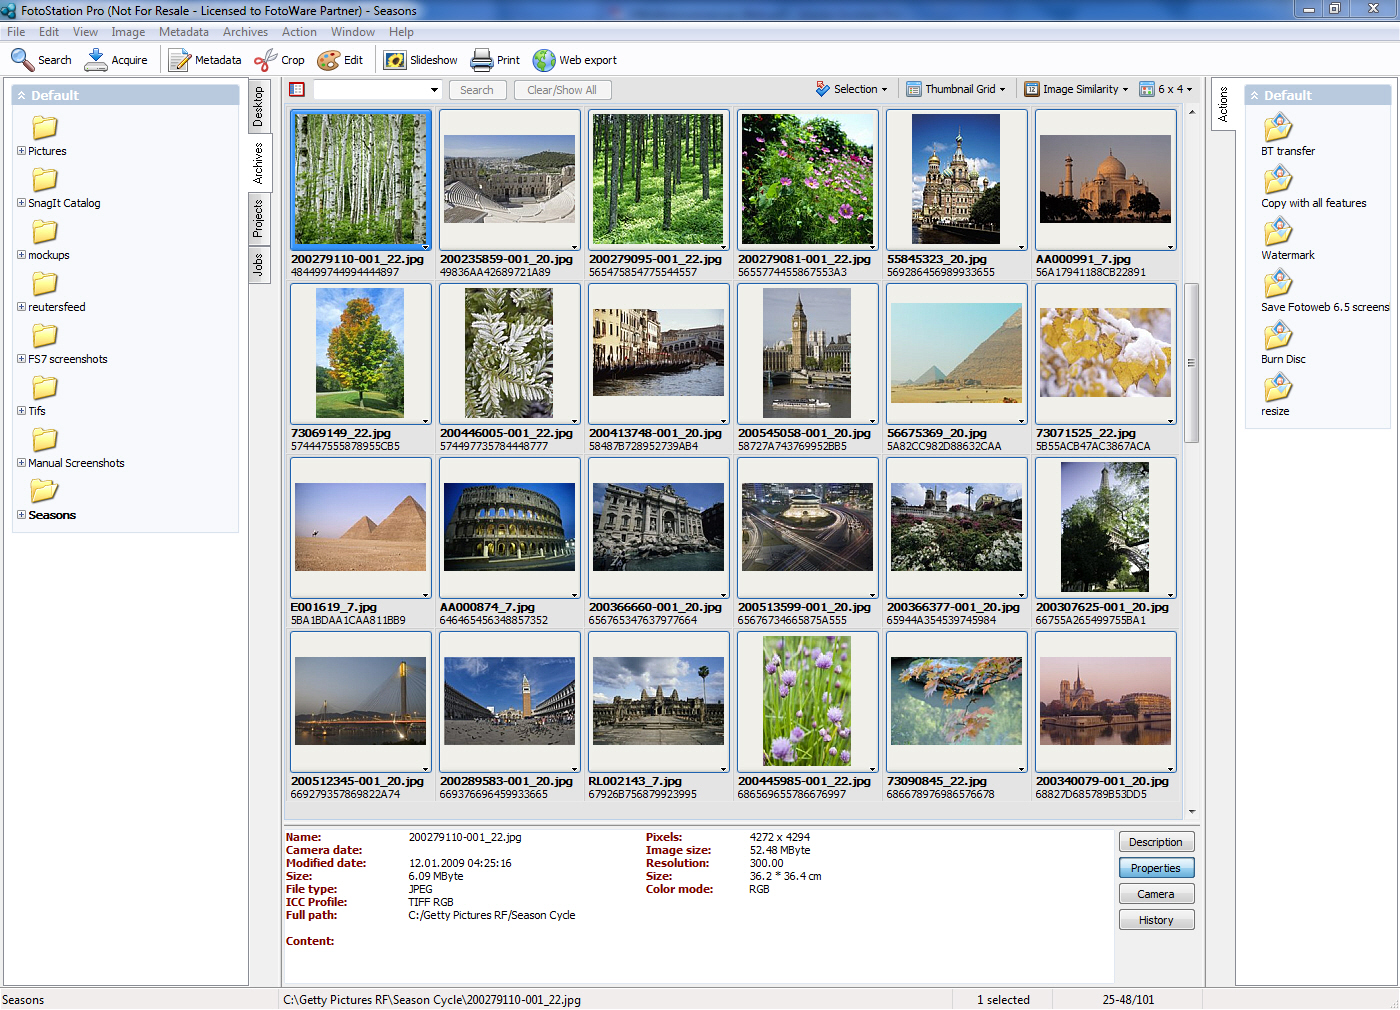
The FotoStation program window consists of the following parts:
Main Menu
Underneath the Title bar (above the Title bar on the Mac) you find the Main menu. The Main menu, together with submenus, contains all functions used in FotoStation.
Main Toolbar
In the Main toolbar you find buttons for quick access to some of the most commonly used functions. In FotoStation, hold the mouse pointer (hover) over one of the buttons in the Main toolbar to view that button’s tool tip. The tool tip provides information about the current button’s functionality.
Sometimes you will see that almost all buttons in the Main toolbar are disabled. This happens when no files are selected. Select a file by clicking on it and the buttons will be enabled.
Image Window Toolbar
The Image window toolbar contains different ways to view and sort the content of the Image window. Using this toolbar you can view images as thumbnails or as detailed lists, change the sort order, change the number of thumbnails, together with many other options.
Image Window
The Image window is where the content of the current source is displayed. When the images are shown as thumbnails, this part of FotoStation looks very much like a light table.
Text Panel
Below the “Image window” you find the Text panel. In this part of FotoStation you find information that is saved together with the file (often called a file’s metadata) together with other types of information such as the file’s name and size. The information is divided into four parts that can be viewed by clicking on the four buttons on the right-hand side of the panel.
Except for the History button, the content of each of the four buttons can be configured according to your needs, and it is possible to show any available information.
The Text info button displays information such as the file’s caption and keywords.
The File info button displays information such as file name and size.
The Camera info displays contains camera information (EXIF).
The History button displays information regarding what has been done with the file.
Left and Right Side Panels
The two side panels can be configured in almost any way you want. You can have as many or as few tabs as you like and you can have one, or two side panels, or none at all. A side panel can contain any number and combinations of the five different types of tabs.
The five tab types are:
The Desktop tab gives you access to the file explorer (a Finder-like window on the Mac). You can view any folder on your machine and network from here.
This tab displays archives. On this tab you can create and display new archives by right-clicking on the archive’s group heading. See the Creating archives topic for more information regarding archives.
This tab lists all jobs that have been acquired. You can create a job manually, or a job can be created automatically when you acquire images from a camera or memory card.
A Project tab contains projects that can combine images from several different folders. Only links are created, so the image files are not moved or copied to other locations. This means that one file on the computer disk can exist in many projects.
This tab contains actions that can be performed on the images, for example copying the image or changing the image’s size. See the Actions overview topic for more information.
Status Bar
At the bottom of the FotoStation window you find the status bar. Here you get information regarding the application’s status. For example, the name of the selected source (folder, archive, or project) will show up in the left-hand side of the status bar.
In the right-most part of the status bar, the range of files currently shown will appear, together with total number of files in the selected source.
When FotoStation is performing time consuming processes, such as scanning a folder for images, a progress bar will appear in the middle of the status bar. If you want to abort the process, press the Esc key.